Cross Account VPC to VPC Peering

I’m currently playing with multiple VPCs in multiple accounts. As a result of my home lab experiments gone awry I now find myself in need of connecting VPCs to each other that aren’t even in the same account. This is the step-by-step process for establishing VPC peering connectivity across multiple accounts. Before you begin, ensure that you have the AWS account number and VPC ID of the VPCs you are peering.
Important:
If the VPCs have overlapping IPv4 CIDR blocks, or if the account ID and VPC ID are incorrect or do not correspond with each other, the status of the VPC peering connection immediately goes to failed.
To request a VPC peering connection with a VPC in another account in the same region
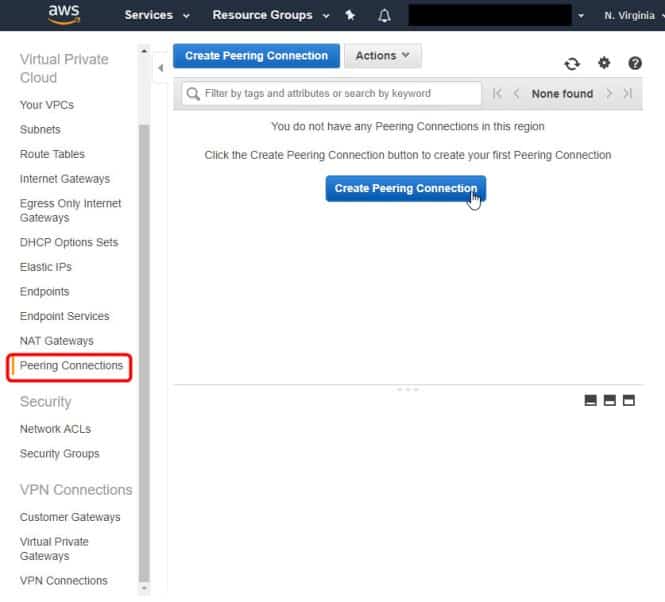
- Open the Amazon VPC console for the account initiating the peering request
- In the navigation pane, choose Peering Connections -> Create Peering Connection:
- Configure the information as follows, and choose Create Peering Connection when you are done:
- Peering connection name tag: Naming your connection creates a tag with a key of Name and a value that you specify.
- VPC (Requester): Select the VPC in your account with which to create the VPC peering connection.
- Account: Choose Another account.
- Account ID: Enter the AWS account ID of the owner of the accepter VPC.
- VPC (Accepter): Enter the ID of the VPC with which to create the VPC peering connection.
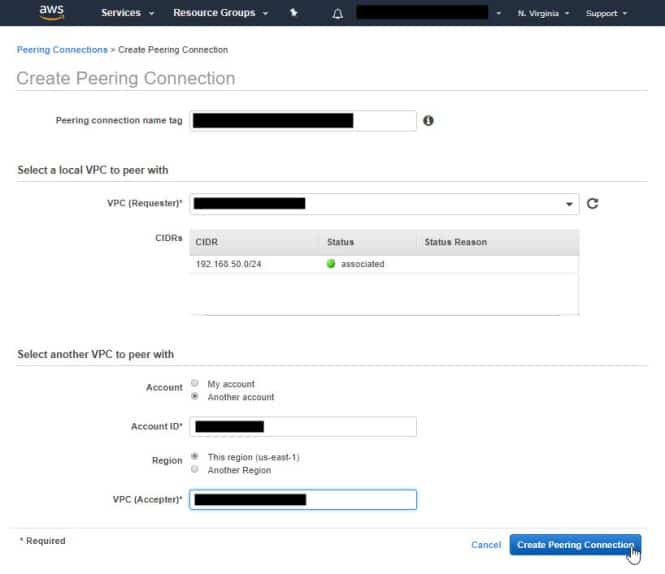
- In the confirmation dialog box, choose OK.
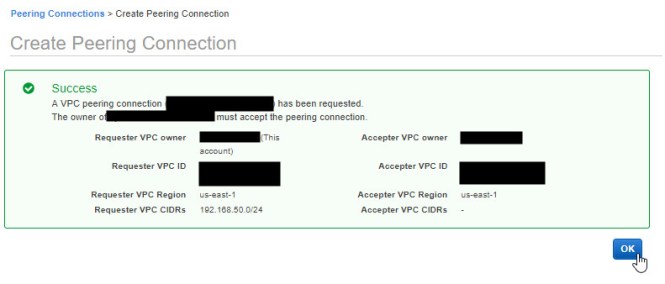

- The VPC peering connection that you’ve created is not active. To activate it, the owner of the accepter VPC must accept the VPC peering connection request. To enable traffic to be directed to the peer VPC, make sure you update your VPC route table.
- Open the Amazon VPC console for the account that is accepting the peering connection request:
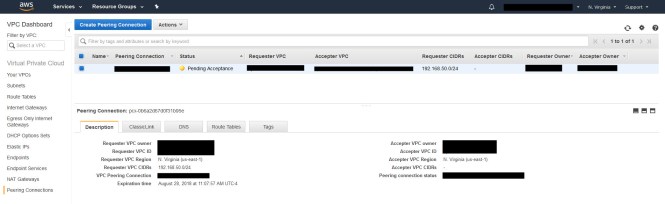
- Go to VPC -> Peering connections and you will see the Peering Connection Request that is in a state of “Pending Acceptance”:
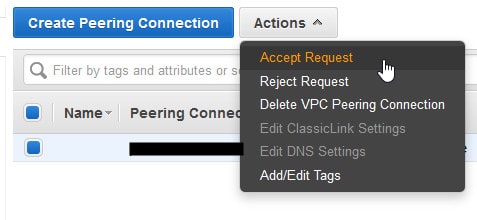
- After confirming that the information matches for requester Owner (do not accept peering connections from strange VPCs, stranger danger!) Choose Actions -> Accept Request:
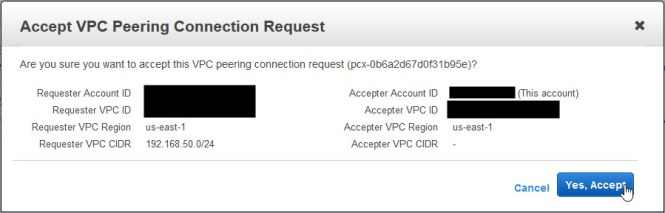
- Then click Yes, Accept:
- Click Close:
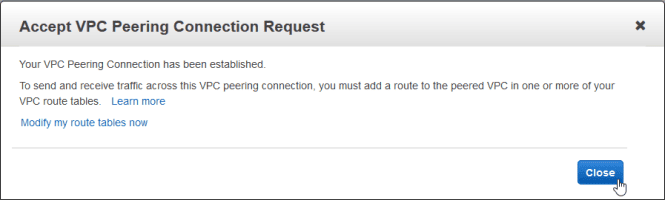
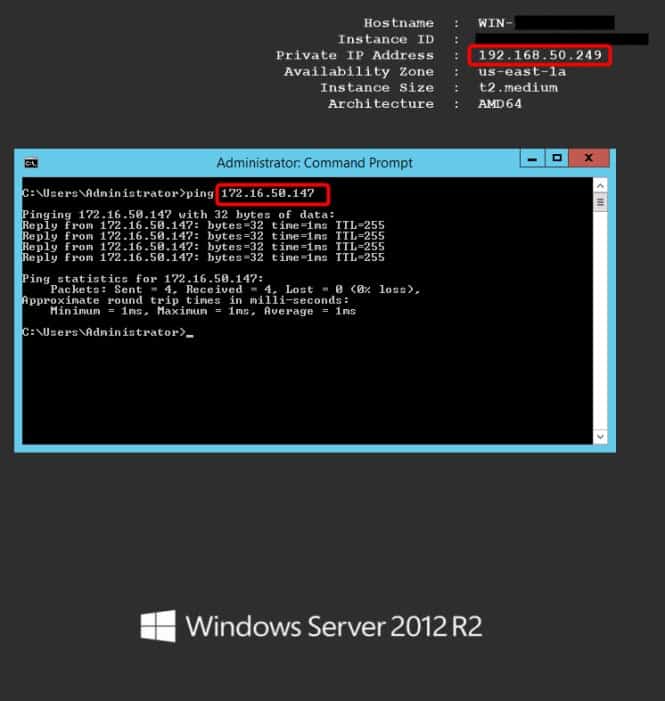
The next step is to establish routing between the 2 newly connected VPCs. I won’t get into the details of that here, but once you’ve pointed BOTH VPCs to each other for their respective CIDR blocks AND modified your Security Groups to accommodate the new traffic, you’ll be able to communicate from one VPC to another:
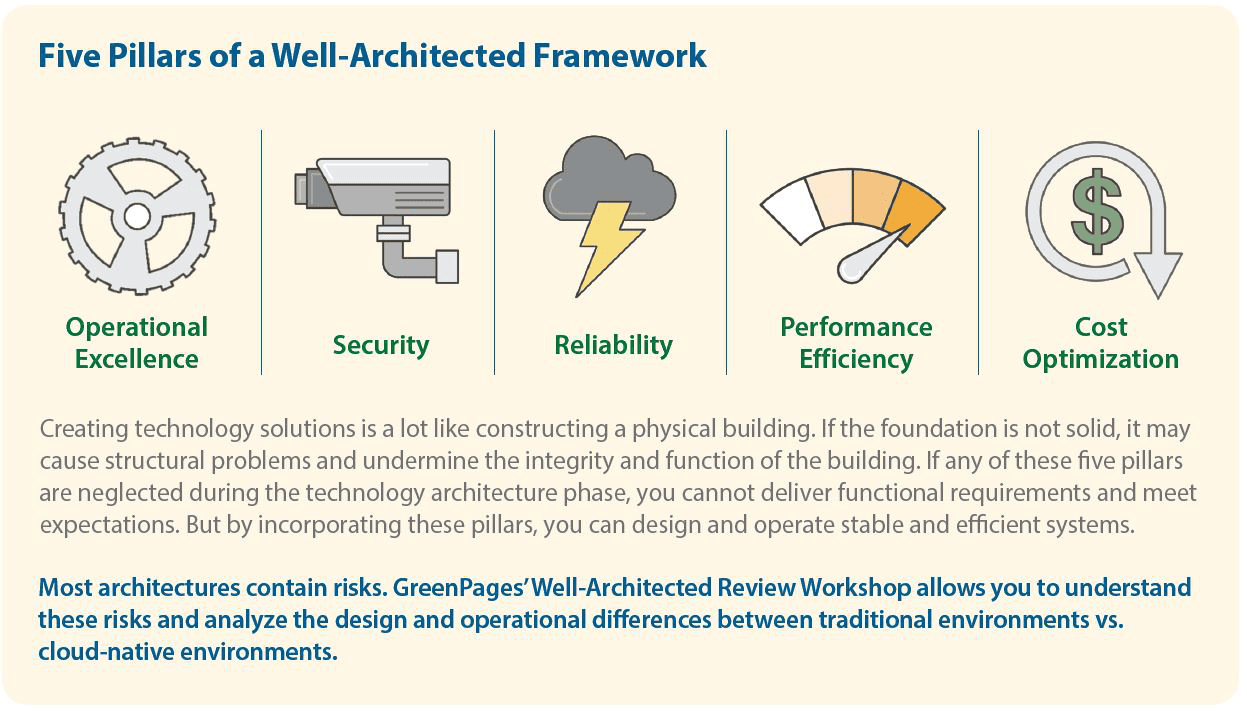
If you enjoyed this and want to learn more about AWS Architecture best practices, check out BlueMantis’ Well Architected Review.